At-Home Soil Health Evaluation
June 18, 2025
There are several ways that you can track soil health changes using in-field tests and observations, many of which are DIY-friendly. To accurately administer these tests, it is helpful to return to the same location each time you perform the assessment, creating a benchmark for future years. Use the “Mark My Location” tool on your smartphone maps to save the field coordinates easily. Alternatively, you can use physical pin/marking flags where you performed the test and use different colored flags to remember which test you did in what location. In this blog, we will be covering how to perform slake tests, water infiltration measurements, and earthworm counts on your own fields.
SLAKE TEST
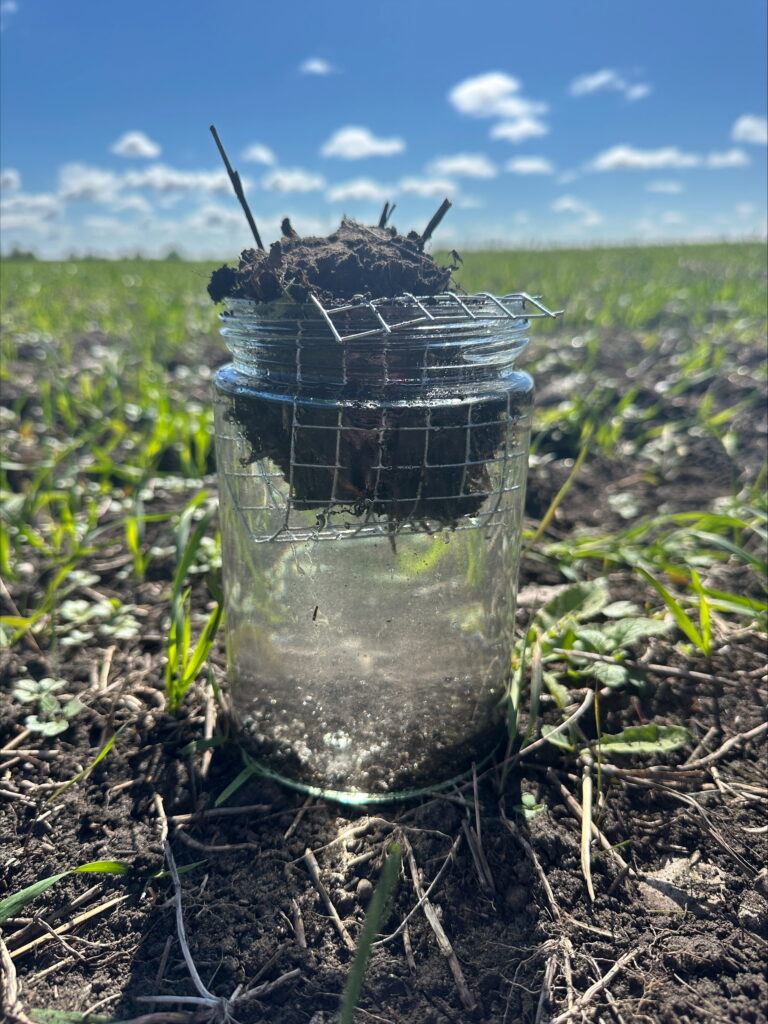
This simple test requires easily obtainable materials to test and evaluate soil aggregate stability in water. Interestingly, slake means to “quench or satisfy (one’s thirst)”. Thus, it makes sense that we are looking at what is essentially the ability for the soil to “drink” in water when it receives it and not fall apart instantly. A chunk of topsoil is placed on a mesh sheet consisting of 1cm-by-1cm squares and submerged in water, where the observer will see different results depending on the quality of the soil added.
Supplies:
- Wide-mouth glass jar
- Chicken wire (1cm-by-1cm), cut into a long strip that is slightly less wide than the diameter of the jar opening
- Water (distilled preferred; no slough water)
- Spade/shovel
Steps:
- Select a location in your field that you would like to test.
- Assemble your slake test: adjust the chicken wire so that it creates a basket.
- Dig up the soil with your spade or shovel so that a clump of topsoil is released (around the size of your palm, or similar size to the mouth of the jar).
- Once submerged, you should start to notice the soil clump dissolve in water. Good soil structure will leave water clearer, and slough off flakes of soil material to settle on the bottom; poor soil structure will disintegrate easily upon contact with the water, as well as muddy the water’s color.
- Remember to take photos at the beginning, middle, and end of the test.
- Repeat steps 1-4, this time in a location of the same field that does not see farming activities occurring (along fence line, in rock patch within field, etc.)
What to look for: If your test results in your soil clump dissolving completely in the water very quickly and the water quickly muddies, you have small, poorer soil particle aggregation. Maybe you have seen the negative effects of heavy rainfalls on your field before; soils like these can crust on the surface of the soil and prevent water permeation due to the limited/small soil pores that water must infiltrate to get to plant roots. Good soil structure will have soil flake off the main clump, and the water will remain relatively clear, and soil settles to the bottom.
WATER INFILTRATION
Infiltration is indicative of a soil’s ability to allow water to enter and move downward through the soil profile. Measured in inches per hour, the velocity at which water is infiltrated into soil is known as a soils infiltration rate.
Soil texture has the largest influence on rates due to differing pore space sizes. Sandier soils possess much greater space between particles, creating less risk of compaction and a greater infiltration rate whereas clayey soils naturally have much smaller available pore space, leaving them most at risk for compaction and increased surface runoff. In dryer times of the season clay soils develop shrinkage cracks as they dry. These cracks serve as a channel for additional water to enter the soil profile.
Supplies:
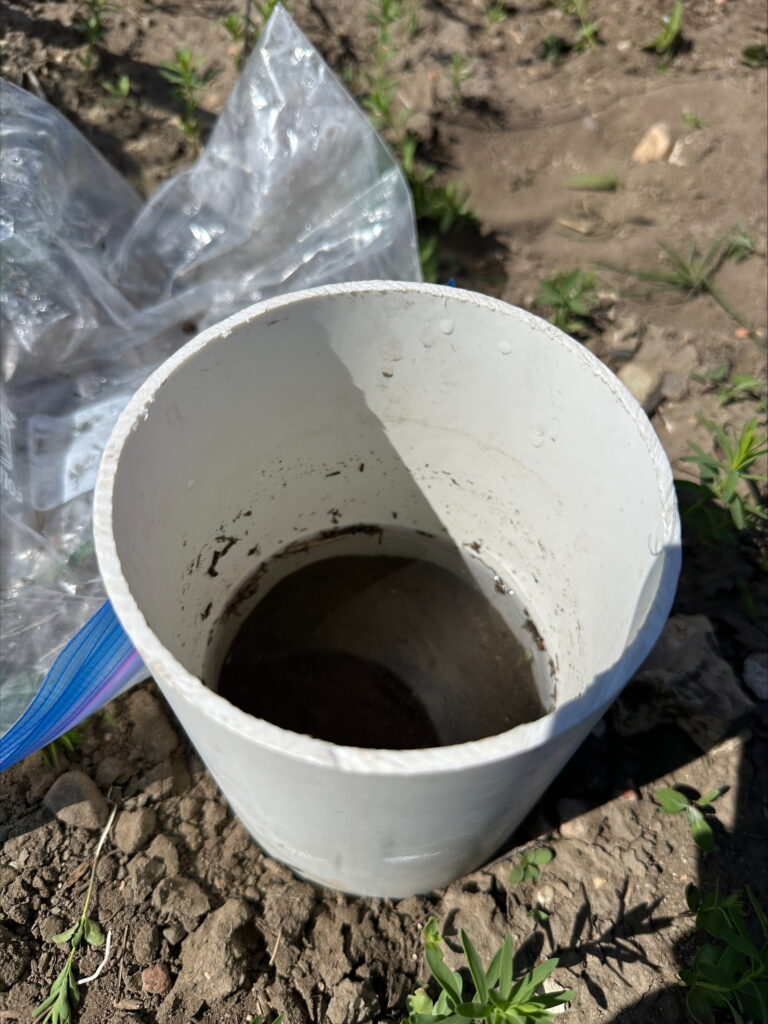
- Steel ring (6” diameter, 6” depth)
- Stopwatch or device for timing
- Water (500 mL bottle)
- Mallet
- 2”x4” piece of lumber (approximately 8-10″ in length)
- Plastic wrap, such as saran wrap
Steps:
Choose a minimum of two areas in your field you’d like to test. Water infiltration largely varies throughout a field. By choosing multiple test sites, both localized & area-wide trends from field activities can be addressed.
- Begin by choosing a spot you’d like to test, avoiding cracks or holes.
- Using the mallet and 2×4 drive the ring into the ground to a depth of 3” ensuring it is evenly seated.
- Line the inside of the ring with plastic, creating a basket.
- Pour full water volume into the ring and remove plastic when ready to start timer.
- Observe if there is bubbling, how quickly water is absorbed, etc.
- Once all water has infiltrated into soil, consider digging under tested soil to see the depth that water moved in time.
What to look for: If the water takes more than 30 minutes to completely infiltrate the soil, the infiltration rate in that particular area is poor and you may have heavier clay soil. If it takes 5 minutes or less, you have soil structure with larger pores that allows for rapid permeation of water through the soil profile, possibly with more sand.
EARTHWORM COUNTS
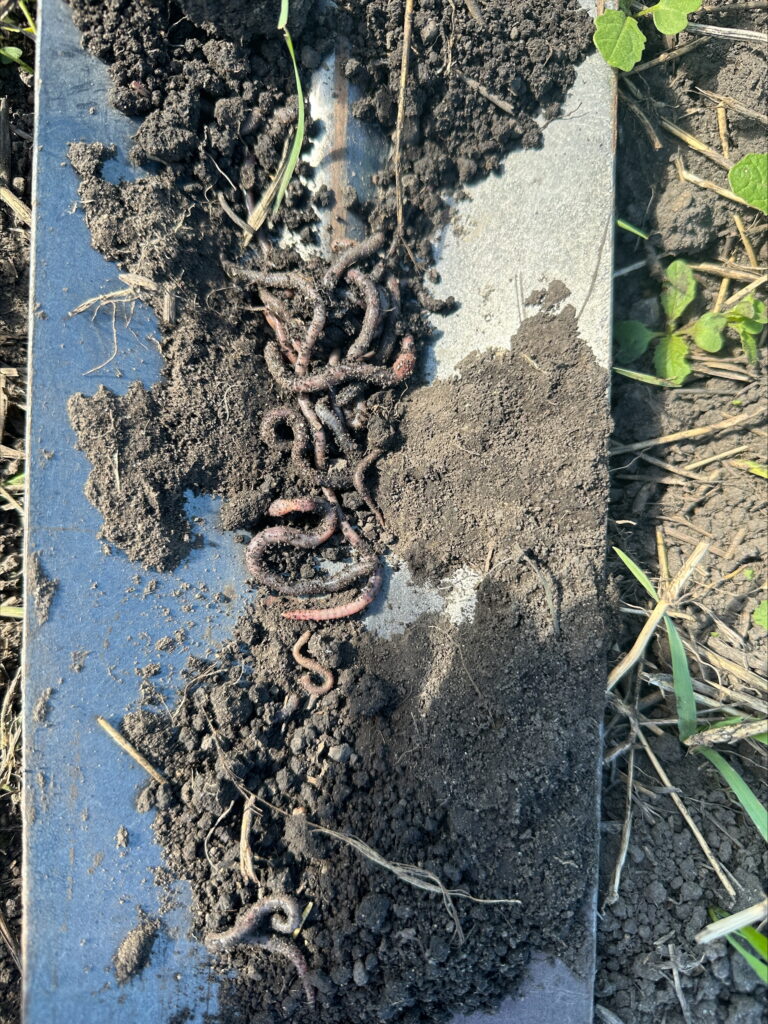
The presence of earthworms can be an easy visual indicator of the overall health of your soil. Worms play key roles in breaking down decomposing material, nutrient cycling, and building soil structure, among many other critical jobs within the ground.
Supplies:
- Shovel
- Ruler
- Light-colored sheet/tarp
- Container with lid (not clear)
- Camera
Steps:
- From a random spot in your field, dig one cubic foot of soil out of the ground in a randomized square (12” wide x 12” long x 12” deep)
- Place this soil on the light-colored surface (tarp, sheet, etc.)
- Sift through the soil and remove worms that you find to be put into the container with the lid.
- Once completed search of the soil, record the total number of worms (adult or juvenile)
- Before returning to soil, place worms on the light-colored work surface and take a picture for reference.
- When finished, gently place the worms and soil back into the pit.
- Before leaving, label the image file with information such as the date and time of day, field name, location within the field, and conditions on the day of sampling.
What to look for: The observation of high numbers of earthworms in your fields can be an indication that your soil is cycling as a system and can create an indirect link to how much organic matter it holds. Lower numbers, or no earthworms at all, can mean that your soil is struggling to cycle, and you may have lower soil organic matter content.
Additional Helpful Links on Soil Health Evaluation:
- If you would like to learn more in depth about do-it-yourself ways to track soil health on your farm, check out the Soils for Life: Soil Health Assessment Guide.
- For how-to videos on how to complete these tests yourself, follow these helpful YouTube links below:
Citations:
“Using the Slake Test to Determine Soil Crusting | Agronomic Crops Network.” Agcrops.osu.edu, C.O.R.N. Newsletter, Oct. 2018, agcrops.osu.edu/newsletter/corn-newsletter/2018-10/using-slake-test-determine-soil-crusting.
“How to Count Earthworms | AHDB.” Ahdb.org.uk, ahdb.org.uk/knowledge-library/how-to-count-earthworms
“Learning Journey: Water Infiltration | Canadian Organic Growers.” https://cog.ca/regenerative-organic-hub/benchmarking-library/water-infiltration/